Connect 1Stream via MCP to your Claude, SpaceX AI, OpenAI, Google Gemni Accounts - Oct 2026
Add 1Stream as an MCP connector in Claude, OpenAI, Codex, Space xAI Cursor, Google Gemni or any other assistant that supports remote MCP servers, in about five minutes.
Earlier, we announced our New 1Stream MCP (BETA) - Phase 1.
An AI assistant can list your systems, look up extensions and queues, check health and live calls, run reports, and (if you allow it) make changes, all through your 1Stream account. You control what it may do with an access level you choose when you connect, and you can see and disconnect every connected assistant from the Control Portal.
The steps below use Claude as an example of how to connect to 1Stream. The same address and the same sign-in page work in any assistant that supports remote MCP servers with OAuth sign-in; only the menu you paste the address into differs.
Note. Official connectors are on the way. 1Stream is being listed in the Claude and Codex connector directories. Once listed, you pick 1Stream from the directory and choose your region; no address to type. Until then, and for every other assistant, add it as a custom connector as described here. The key set-up (section 1) is the same either way.
Step 1: Create an API key for the assistant
An assistant signs in with an API key of your account. Create one just for it:
- Sign in to the Control Portal as an administrator of your account and open System → Partner API / MCP (AI).
- Click Create API key and give it a name, for example Claude connector.
- Tick Allow hosted AI assistants. Assistants such as Claude call from their vendor's addresses, and this is what lets those calls in. It can only be set when the key is created.
- Leave the Allowlist empty. It only applies to calling the API directly with the key, which an assistant never does; with the box ticked the field is optional. Add addresses only if you also want to use this key from your own systems.
- Click Create and copy the API Key ID and the secret. The secret is shown once. You will paste them as apiKeyId:secret.
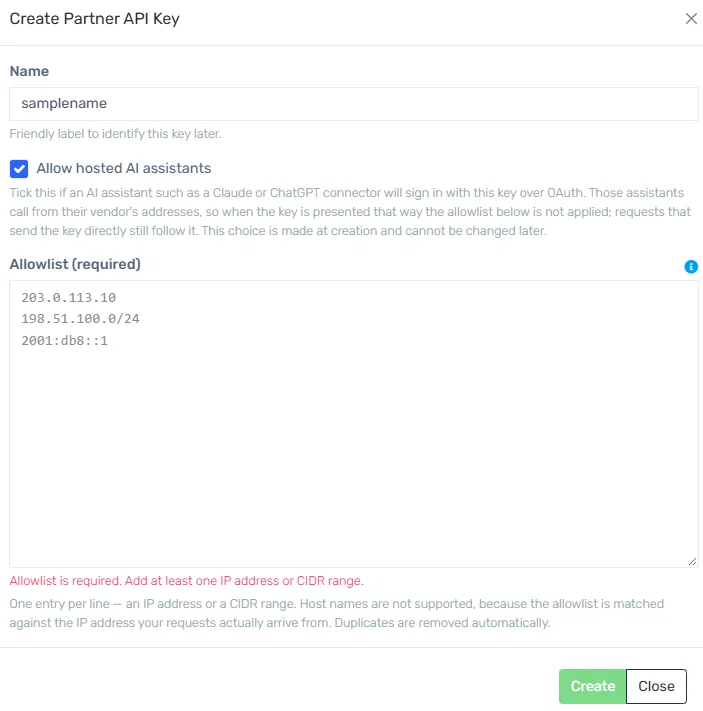
The Create Partner API Key dialog with Allow hosted AI assistants ticked. With the box ticked the allowlist is optional and can stay empty.
Note. If you already have a key without the hosted-assistant option, create a new one. The option cannot be added later; nothing else about your existing keys changes. Keys created for hosted assistants show a badge in the key list.
Step 2: Add 1Stream in your assistant
Use the address for the region where your 1Stream account is hosted. (the addresses below have been intentionally restricted. You can find this information in the Control Portal).
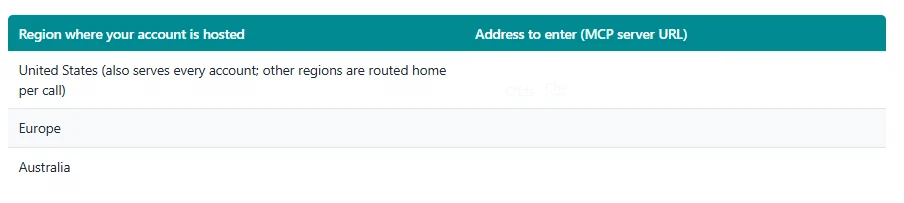
Every assistant asks for roughly the same things:
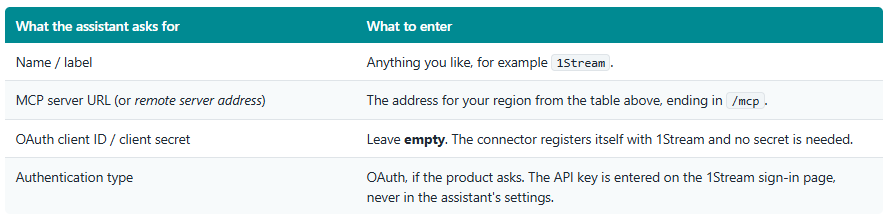
Example: Claude
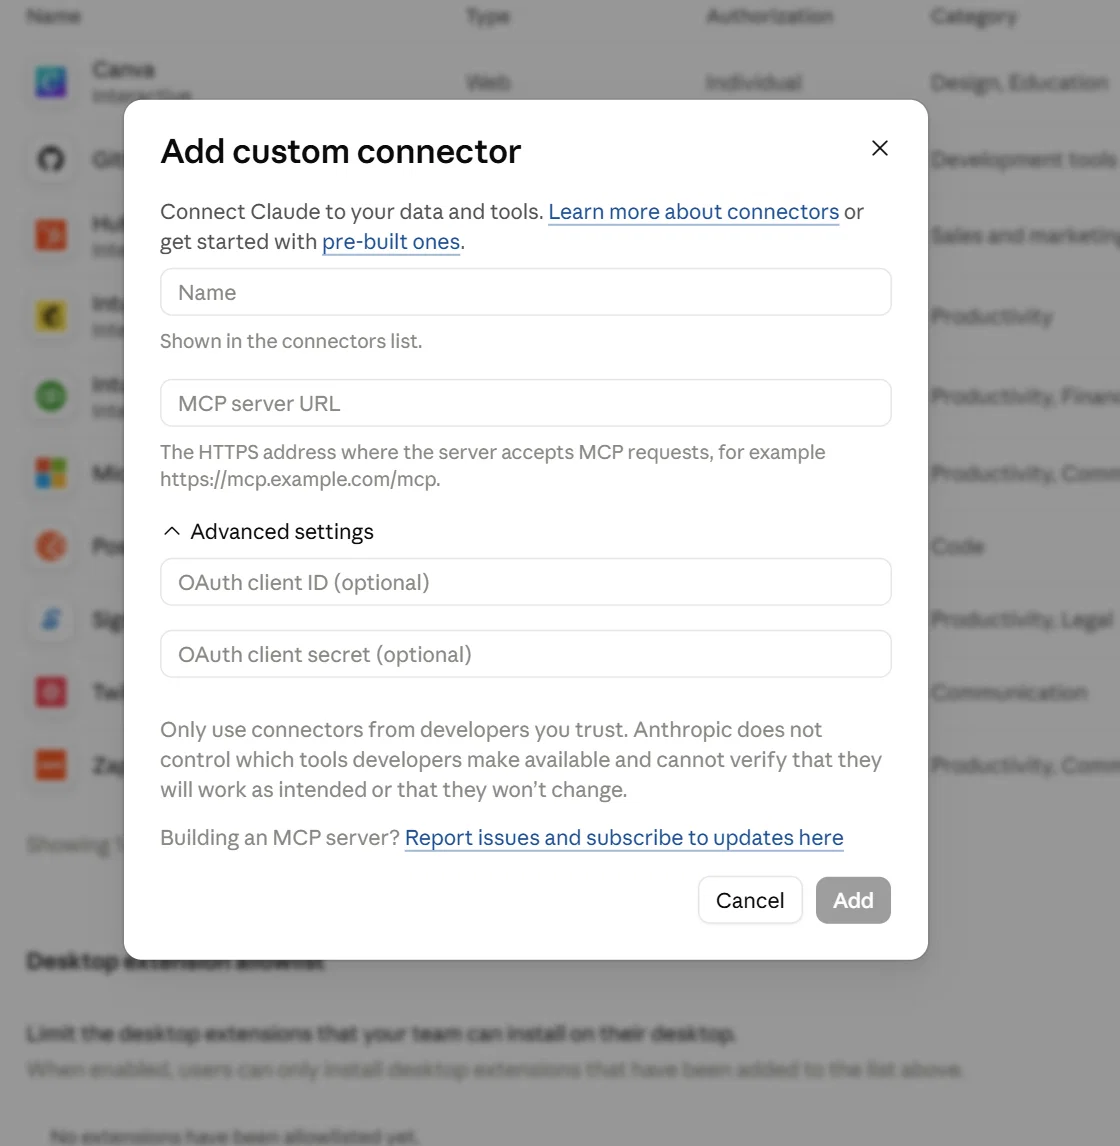
Claude's Add custom connector dialog: fill in the name and the MCP server URL; leave both Advanced settings fields empty.
- In Claude, open Settings → Connectors (organization owners on Team or Enterprise plans: Admin settings → Connectors) and choose Add custom connector.
- Name: what appears in the connector list, for example 1Stream.
- MCP server URL: the address for your region, including /mcp at the end.
- Leave Advanced settings alone: OAuth client ID and OAuth client secret stay empty. The connector registers itself.
- Click Add, then Connect on the new entry. A 1Stream sign-in page opens.
- Paste your API key as apiKeyId:secret, choose the access level (Read only is preselected), and click Connect (see section 3).
- You are returned to Claude with the connector connected. Start a new chat and ask, for example, "List my phone systems."
Other assistants. In ChatGPT, Codex, Cursor and similar products, find the setting for connectors or MCP servers, add a remote server with the same address, and use its Connect or Sign in action. All of them open the same 1Stream sign-in page shown in the next section.
Step 3: Sign in and choose the access level
Whichever assistant you use, connecting opens the 1Stream sign-in page. Paste the API key as apiKeyId:secret, choose what the assistant may do, and click Connect.
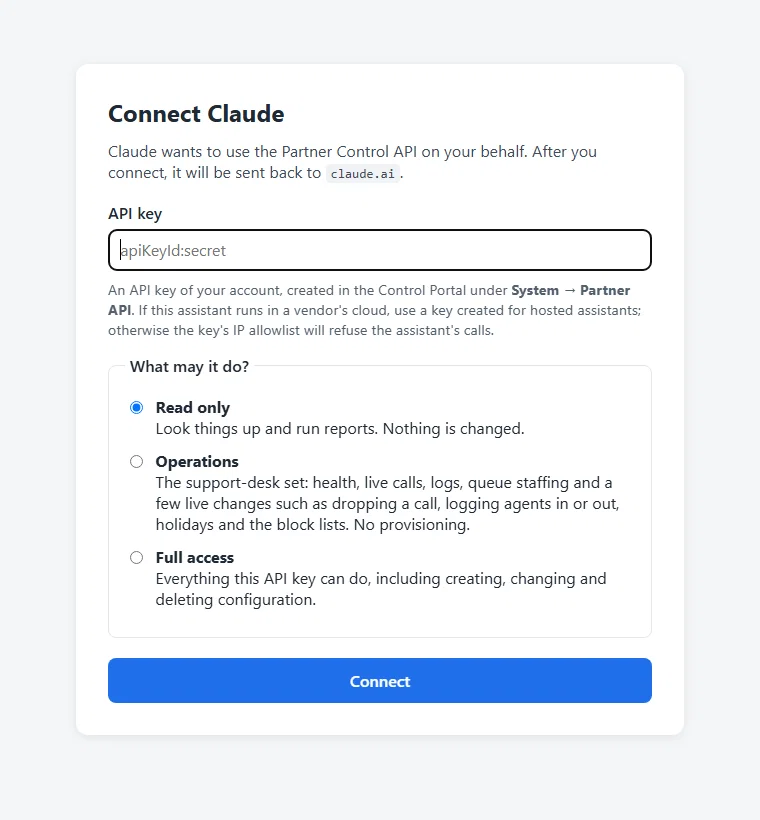
The 1Stream sign-in page. The assistant's name is shown at the top; Read only is preselected.
The access level is chosen here, not in the address. It decides which tools the assistant sees at all, which also keeps its context small.
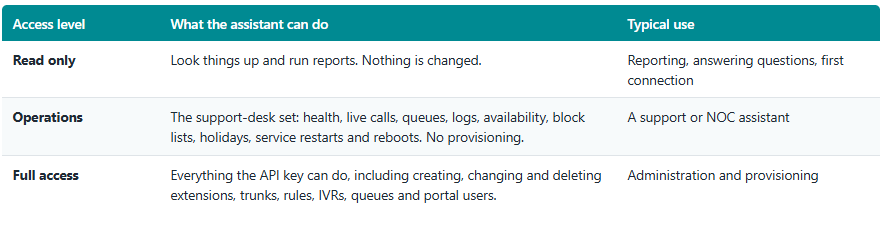
Note. Start with Read only. To widen later, disconnect the assistant in the Control Portal and connect again with the level you want.
Step 4: See and disconnect connected assistants
In the Control Portal, System → Partner API / MCP (AI) shows a Connected assistants panel under your keys: each connection with the assistant's name, its access level, the key it uses, when it connected and when its access expires.
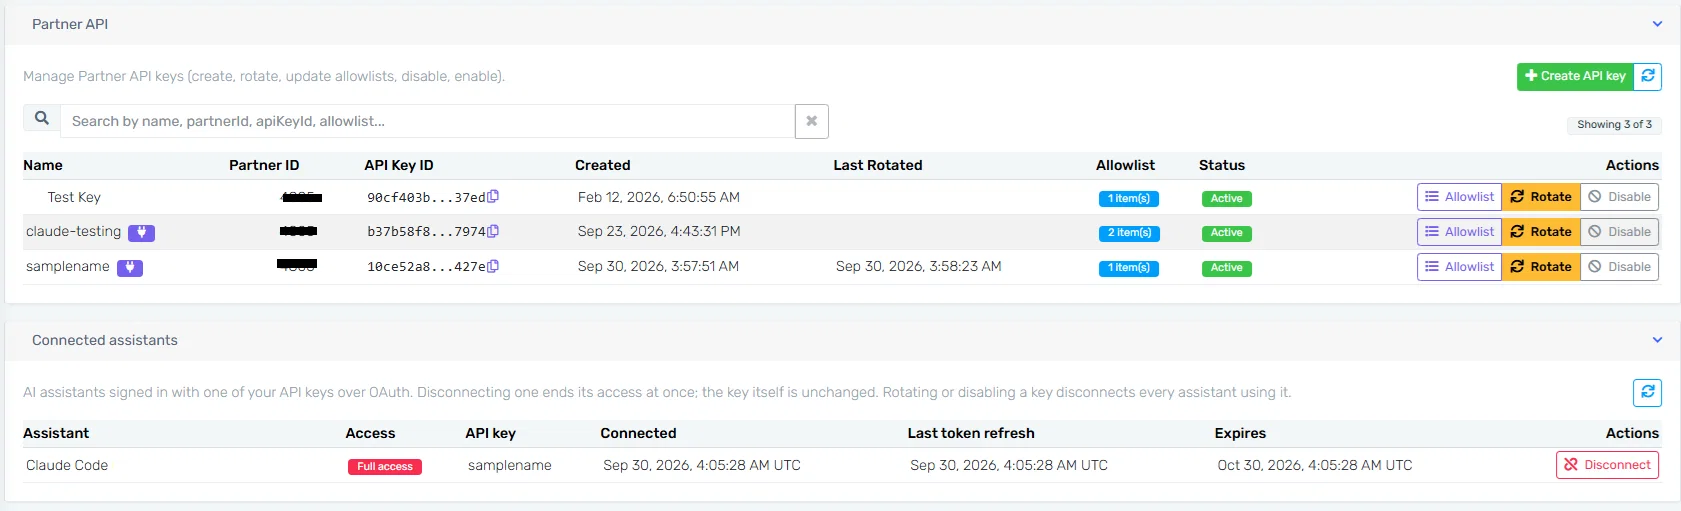
The key list (keys created for hosted assistants carry the badge) and the Connected assistants panel below it, here with Claude Code connected.
- Disconnect ends a connection at once. The assistant has to sign in again to reconnect.
- Rotating or disabling a key disconnects every assistant that uses it.
- A connection that is not used for 30 days expires by itself; connect again when you need it.
Approving tools inside the assistant
Most assistants ask before they use a tool for the first time. Claude, for example, offers Allow once / Always allow / Deny and groups our tools into Read-only tools and Interactive tools; setting the read-only group to Always allow removes most prompts. Independently of the assistant, every 1Stream tool that changes or removes live configuration asks the assistant to confirm the exact action with you before anything is changed.
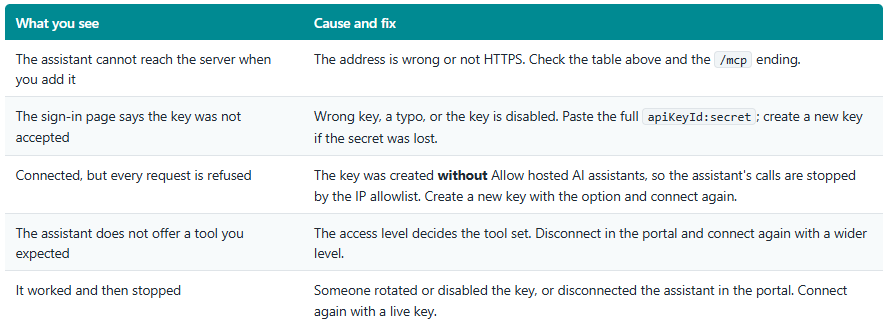
If something does not work